Introduction
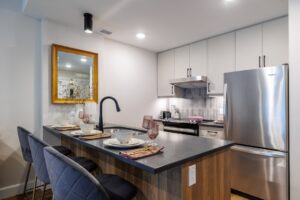
Planning a kitchen remodel is an exciting journey, particularly when integrating luxurious appliances like Sub-Zero refrigeration units. As experts in advanced Sub-Zero repair and installation, Sub Zero Repair Austin is here to guide homeowners through the essential steps needed for a seamless kitchen remodel installation that ensures your Sub-Zero appliance functions optimally and complements the overall aesthetic of your kitchen.
Whether you are opting for the Designer, Classic, or 700 Series models, understanding the intricacies of installation can save you time, effort, and money in the long run.
Table of Contents
Understanding Your Sub-Zero Installation Needs
Before diving into the installation process, it’s vital to appreciate the specific requirements of your Sub-Zero appliance. Each model comes with its own set of guidelines to ensure optimal performance and reliability. Considerations such as electrical needs, site preparation, and leveling are crucial for a successful integration into your cabinetry.
Electrical Requirements
Every Sub-Zero unit requires adequate power to function without disruption. Here’s what you need to know:
- Dedicated Circuit: All Sub-Zero refrigeration models demand a dedicated 115 V AC, 60 Hz, 15 amp circuit breaker. This ensures that your appliance draws only what it needs without overloading the system.
- Grounding: A three-prong grounding-type wall receptacle is essential to reduce the risk of electrical faults. It’s crucial to follow both national and local electrical codes during installation.
- Power Connection: Each unit is equipped with a power cord and a three-prong plug, which should be connected once the appliance is positioned correctly.
Site Preparation and Anti-Tip Brackets
An essential step in the installation is preparing the kitchen and ensuring the appliance is securely mounted. The following steps will guide you:
- Floor Leveling: Verify that the floor under the unit matches the surrounding finished floor level.
- Anti-Tip Brackets: Install anti-tip brackets using sturdy #12 screws and washers, drilled securely into wall studs or a wall plate.
- Check for Obstructions: Ensure that no electrical wires or plumbing exist in the screw paths.
Positioning and Leveling the Unit
Positioning your Sub-Zero unit requires attention to detail to ensure it operates properly:
- Power Off: Always shut off power to the electrical outlet before rolling the unit into place.
- Use of Leveling Legs: Sub-Zero units come equipped with leveling legs that can be adjusted.
- Final Adjustments: Once positioned, ensure the power cord is not pinched, and plug it into the grounded outlet.
Panel and Grille Installation
For those who opt for integrated models or custom cabinetry, the installation of panels and grilles is a critical phase:
- Custom Panels: If using custom panels, ensure you follow the provided templates for drilling holes.
- Grille Installation: After leveling the appliance, grille frames and trim must be reinstalled meticulously.
- Side/Decorative Trim: Attach these components carefully to maintain the overall linear design of your kitchen.
Verification and Final Steps
Once the installation process is completed, conducting a thorough check is crucial:
- Operational Checks: Examine the door/drawer operations, lighting, and cooling functions.
- Secure Fastenings: Reinstall all grills and frames using appropriate screws.
- Post-Installation: Allow time for your unit to cool down and, if using an ice maker, discard the first batch of ice.
Practical Takeaways for a Smooth Installation
- Hire Professionals: Partnering with certified technicians like Sub Zero Repair Austin ensures accurate specification adherence.
- Document Requirements: Compile measurements, electrical arrangements, and cabinetry designs to communicate clearly with the technicians.
- Common Pitfalls to Avoid: Ensure that your space is cleared and accessible.
- Regular Maintenance: Establish a routine check-up with Sub Zero Repair Austin to maintain your appliance.
Professional Help
At Sub Zero Repair Austin, we specialize in complex Sub-Zero appliance installations, repairs, and maintenance. Our certified technicians employ personalized diagnostic and repair protocols specifically for Sub-Zero products, ensuring long-term, reliable results.
FAQ
- What are the electrical requirements for Sub-Zero units? A dedicated 115 V AC, 60 Hz, 15 amp circuit is needed.
- Do I need a grounding receptacle? Yes, a three-prong grounding-type receptacle is essential.
- How important is floor leveling? Critical—an unlevel foundation can impair functionality.
- What should I do if the appliance isn’t cooling properly? Verify that the power is connected and that the unit is level.
- How can I maintain my Sub-Zero unit after installation? Schedule routine check-ups with Sub Zero Repair Austin.
Conclusion
As you embark on your kitchen remodel journey, trust our expertise to ensure that your new Sub-Zero unit is set up for success from the start. Are you planning a kitchen remodel and need a reliable partner to help with your Sub-Zero installation? Contact Sub Zero Repair Austin today to explore our specialized services. Schedule a service appointment or call us for more information about how we can assist you in achieving the kitchen of your dreams.
Your comfort and satisfaction are our top priority. Schedule service at +1 (737) 373-3620.